
As Doctors we write about evidence- based facts and with that in mind select products we believe to be the best for our readers. Thelifestylecure.com is a participant of the amazon associates program and we may earn a very small commission from qualifying purchases at no extra cost to you.
What do we mean when we say we have “tight hips?”
Tight hips are a very common problem that most people suffer with regardless of age. It is as common in the elderly as it is in the young. The only suggested difference could be that when we are young, we may be able to move around more easily compared to when we are older.
But the principle behind having tight hips is the same for mostly everyone. It occurs because we spend a lot of our day sitting down and are basically inactive. Whether that’s behind a desk at work or at home, at school, on the route to and from those places or everything in between.
These periods of inactivity lead to tightening of the muscles around the hips causing discomfort and/or pain.
Which is why it is imperative to use techniques like yoga to open up tight hips. Especially in order to provide pain relief and increased sense of flexibility.
Anatomy of Muscles Causing your Tight Hips
Did you know that there are four groups of muscles that make up what is referred to as the hip complex. These four groups support and maintain the stability of the hip and work in conjunction with your knee and lower back as well.
The National Academy of Sport’s Medicine lists the 4 groups of muscles around the hip as:
1) Hip Flexors – Iliopsoas meaning the iliacus and the psoas muscle respectively.
2) External Rotators – The quadratus femoris, piriformis, superior/inferior obturator, and superior/inferior gemellus.
3) Glutes – Gluteus maximus, gluteus medius, gluteus minimus, and the tensor fascia latae.
4) And finally the Adductors.
For those interested in knowing how each muscle group works, feel free to watch the video below. It provides more in depth knowledge of the Hip Muscle Anatomy, Supports, and Movements By Human Physiology.
Exercising These Muscles
In order to prevent pain and/or discomfort from tight hips we must focus on stretching and strengthening these muscles listed above so as to protect ourselves from injury.
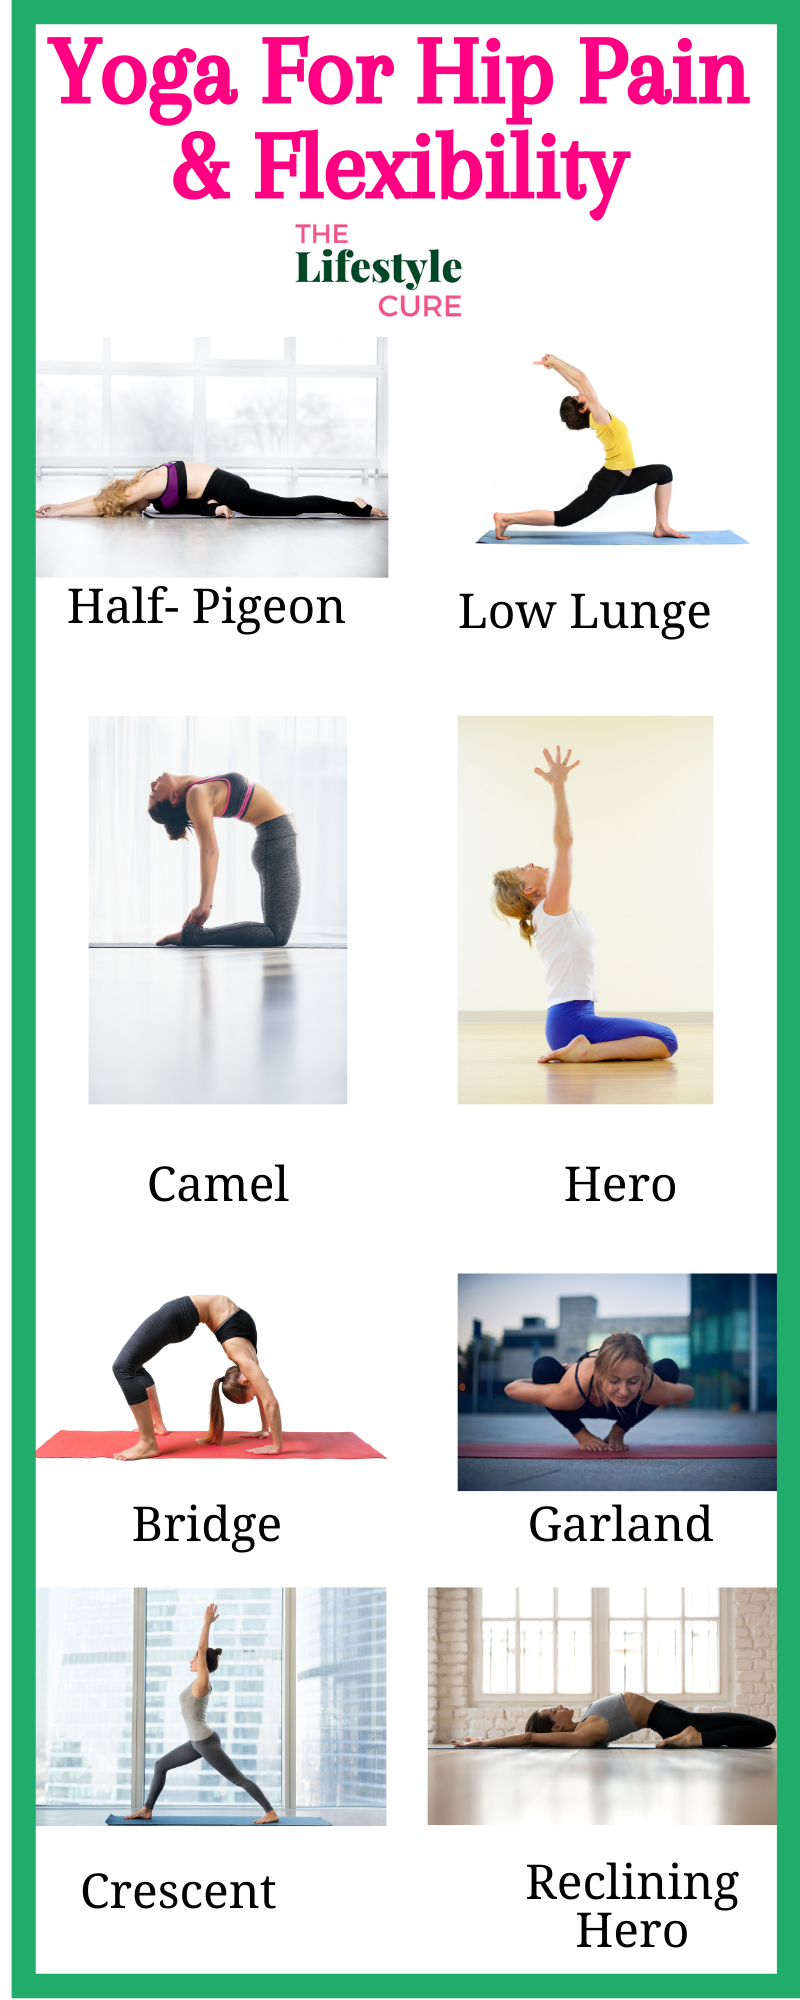
A great way to release tight hip muscles is to do yoga. I have made a list of poses that one can do when experiencing discomfort around their hips. These 11 yoga poses will help with hip pain and increase your flexibility at the same time.
In order to utilize these hip opening yoga poses for flexibility and pain relief you should have the right tools. One such important tool is having a good yoga mat. I recommend investing in (yourself) and a great yoga mat!
This yoga mat called GoYoga is one of the most highly coveted yoga mats available online. It’s known to have a good grip and be extra thick, all with an excellent price point. It’s available on amazon (in several different colors), with the pink one being the most popular of them all.
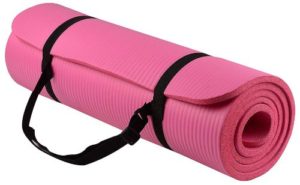
Click on the BalanceFrom GoYoga Mat at amazon
This yoga mat pictured above is so popular that I decided to order it for myself and I can’t wait to try it out any day now! It comes with an excellent price tag and has all the features that I really look for in a good yoga mat.
These include: Double sided (!) non-slip surfaces, it’s extra thick (which is good for me as I’ve had two knee surgeries), moisture resistant, the length is perfect, and others have reported that it doesn’t wear and tear easily. To me, that’s a recipe for success (in all my yoga poses).
Now, let’s take a look at the top 11 hip opening yoga poses for flexibility and pain relief!
Table of Contents
Hip Opening Yoga Poses For Flexibility and Pain Relief:
To work your external rotator muscles, do the following poses –
1) Eye of the Needle/Figure Four Pose
- Begin by lying on the floor with your legs straight and then slowly bend them while keeping your feet planted on the floor.
- Cross your right ankle over your left thigh and flex your right foot.
- Now interlock both your hands behind your left thigh, making sure that your right arm is between your legs and your left arm is by your left side.
- Slowly begin to bring your left thigh closer to the body (using your hands to guide you) until you feel a pleasant stretch in your right hip.
- Hold this pose for 30 seconds and then release.
- Repeat on opposite side.
2) Half Pigeon Pose

- Start in a tabletop position.
- Picking up your right leg, begin to move it forward until your right knee is directly behind your right wrist. Make sure your toes are flexed.
- Now slowly start to move your left leg back straight until it is completely on the floor (or as much as possible).
- Make sure your hips are aligned with one another (one should not be higher than the other).
- If this is not possible, then slowly untuck your right shin and move it in towards the body (as shown) and also bend your left leg as needed if keeping it straight is bothersome.
- Keep your chest upright, tummy tucked, shoulders down and arms out by your side or place your hands on the floor for support in order to keep you upright.
- Hold for 30 seconds, release and repeat on the opposite side.
To release tight hip flexors, try the following poses –
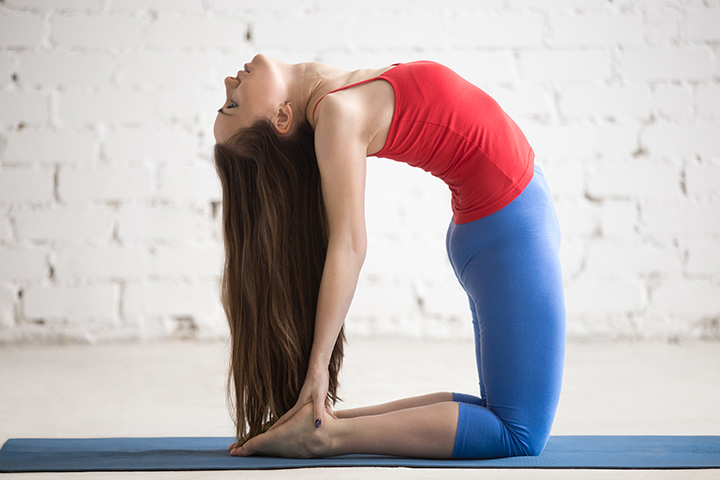
3) Camel Pose
Shutterstock
- Begin by kneeling down onto your knees making sure they are hip distance apart.
- For beginners simply place your hands, fingers pointed down, on your pelvis and lengthen through your tailbone. Keeping your chin slightly tucked, lean back and hold this pose for 30 seconds and release.
- For the more advanced take your hands and place them behind you on your heels with your fingers pointed toward your toes and thumbs on the outside edge of your feet.
- Let your head drop down or keep it in neutral position if desired.
- Hold for 30-60 seconds and then release.
4) Low Lunge
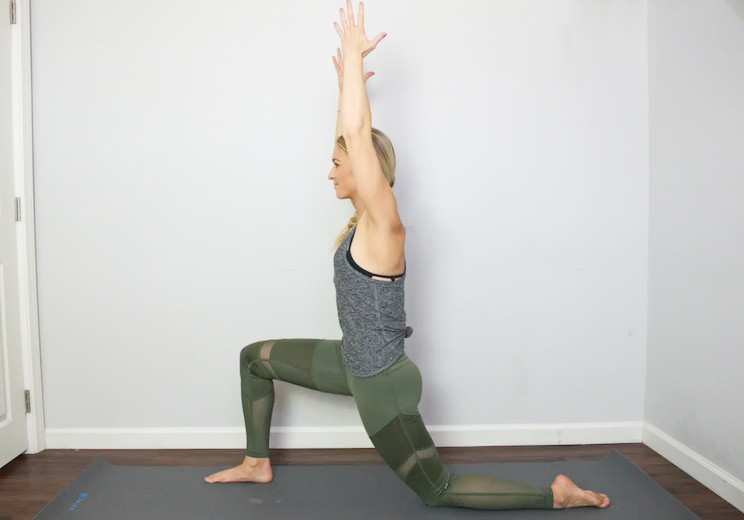
- Start in a high plank position.
- Step your right foot in between your hands with your knee directly over your ankle.
- Lay your left knee on the floor and untuck your toes.
- Start to bring your hands onto your thigh while lifting your chest up at the same time and keeping your stomach tight.
- Slowly press your hips forward until you feel a relaxing stretch through your left hip and begin to raise your arms overhead while keeping your shoulders down and back. Palms should be facing one another at the top.
- Hold for 5-10 breaths, release, and then repeat on opposite side.
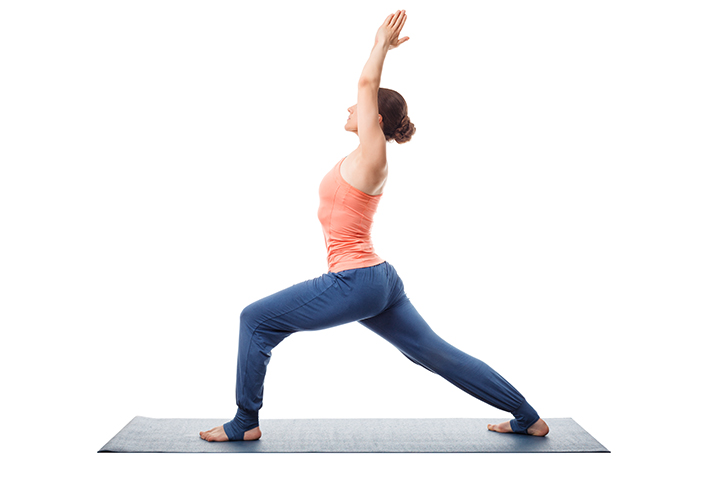
5) Crescent/High Lunge Pose
Shutterstock
- Begin in downward facing dog.
- Exhale and bring your right leg between your hands with knee stacked above your ankle.
- Inhale and raise your torso upright while sweeping your arms, palms facing inward, out to the sides and then above your head.
- Lengthen through your tailbone without overarching and look upto toward your hands reaching your arms up as high as they will go.
- Hold the pose for 30 seconds and release.
- Repeat on opposite side.
6) Bridge Pose
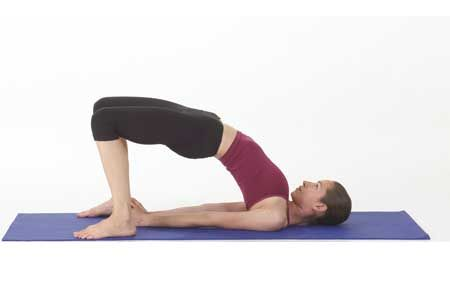
- Start by lying on your back. Bend your knees to 90 degrees to the floor with your feet planted and hip width apart.
- Keeping your arms out by your side, palms facing down while you inhale, slowly raising your hips up toward the ceiling. Press your palms into the floor as your raise for next support.
- Hold this pose for 10 breaths or less, then slowly lower back down one vertebra at a time.
To loosen your glute muscles (excluding your maximus muscle as that is primarily involved in extension and lateral rotation of your hip) do the following poses –
7) Hero Pose
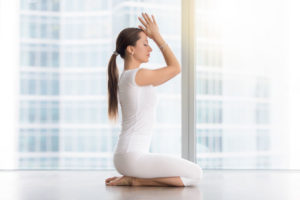
- Begin by kneeling upright on the floor with your knees touching.
- Slowly begin spreading your feet out past your hips while making sure that they are pressed down flatly on the floor.
- Exhale and lower yourself down so that you are now sitting evenly on your sit bones.
- You can press down on your thighs with your hands or hold them in front of you in a pray position.
- Keep your tummy tucked, shoulders down, and back straight.
- Hold the pose for 30-60 seconds and release.
8) Reclining Hero Pose
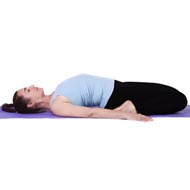
Start in hero pose.
- Begin by placing your hands on the floor behind you, lowering yourself back down by leaning your weight into your hands and lowering your forearms onto the floor.
- Continue to lower yourself down all the way down (only if possible) by feeling the stretch in your hips and having your knees as close as possible.
- Keep your arms by your sides, tuck your chin slightly and look down at your chest/stomach.
- Hold the pose for 30 to 60 seconds and then release.
To work your adductor muscles if they tend to be tight, do the following –
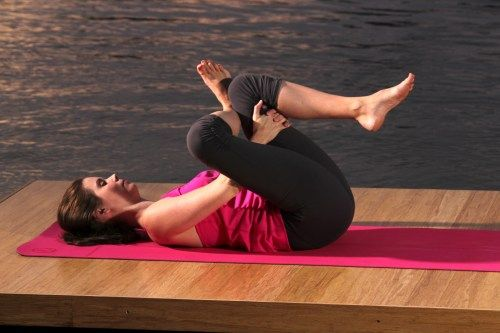
9) Happy Baby Pose

- Begin by lying down on your back directly on your mat.
- Start by bending both knees, picking your feet up off the mat and then taking your arms (either inside or outside of your legs – which ever is more comfortable) straight above and grabbing ahold of your ankles/feet. Feet should be flexed at this moment.
- Keep your stomach tight as this will ensure your back is not lifted and is lying on your mat completely.
- Feel a stretch in your hips as you slowly begin to rock side to side.
- Hold for 30 seconds and then release.
10) Frog Pose
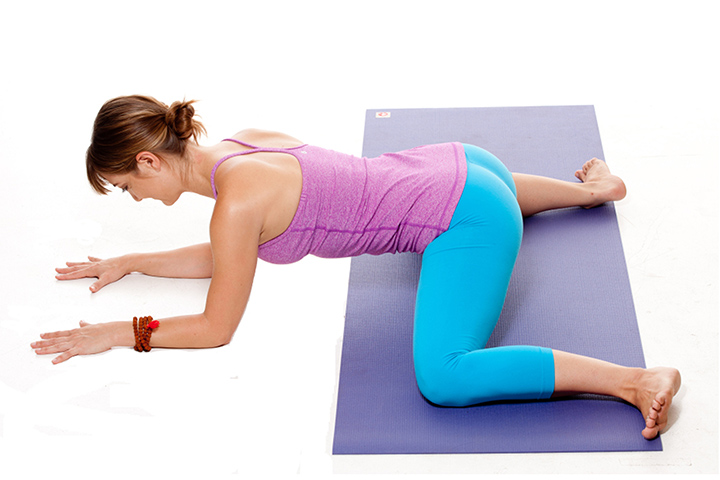
- Start in a tabletop position.
- Slowly begin to spread your knees out as far as comfortably possible with your knees bent at 90 and the inside edge of feet laying on the floor.
- Inhale and elongate your body, with your spine straight.
- Exhale and begin to lower yourself down onto your arms with elbows stacked under shoulders. Make sure your stomach is engaged throughout this movement.
- Stay here for 30 seconds and release.
11) Squat/Garland Pose
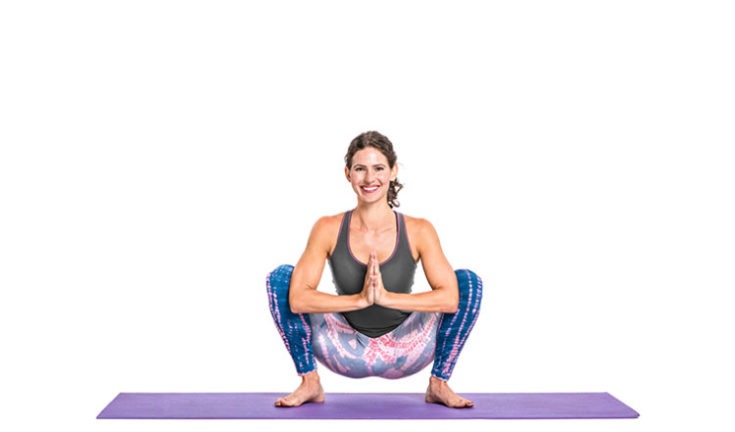
Gaia
- Start by standing a little more than hip width apart.
- Slowly begin to squat all the way down to the floor, trying to keep your feet planted. If not possible, place a block and sit directly on it when squatting.
- Making sure that your thighs are spread out slightly wider than your torso, exhale deeply while bending forward until your torso is between your thighs.
- Bring your arms up into a pray pose (palms of hands pressed against one another), with your elbows pressing outwards on your legs in order to deepen the stretch.
- Hold for a few seconds, inhale, and release.
You’re more than welcome to only try one or two of these poses. Or add as many as you’d like to your daily practice. The choice is yours!
I hope you enjoyed this article about the top 11 hip opening yoga poses for flexibility and pain relief!
Stay happy, stay healthy!
For more on yoga check out:
Morning Yoga Stretches: Secrets To Waking Up Happier!
Top 11 Weight Loss Yoga Poses! For Beginners
11 Absolute Best Yoga Poses For Beginners
