
As Doctors we write about evidence- based facts and with that in mind select products we believe to be the best for our readers. Thelifestylecure.com is a participant of the amazon associates program and we may earn a very small commission from qualifying purchases at no extra cost to you.
Table of Contents
Morning Yoga
Many have said that waking up on the wrong side of bed can affect your productivity and mood throughout the day so, why not do something to change the outcome?
Morning yoga stretches have been found to:
1. Increase mental clarity throughout the day
2. Boost energy levels
3. Reduce stress levels
4. Increase your metabolism and digestion
5. Increase muscle tone
By doing yoga stretches first thing in the morning you will increase blood circulation which in turn will increase cell oxygenation and invigorate your whole body.
Yoga immediately changes your brain chemistry by producing more GABA (gamma aminobutyric acid) which is associated with lower levels of depression and anxiety and increases your happiness.
And those who practice long term yoga have been reported to be happier and healthier while reducing fatigue, anxiety and anger.
With ALL the benefits how can you not want to do morning yoga stretches?! But what IS yoga stretching exactly?
Lets take a more in-depth look at yoga stretching and all that it entails.
Yoga and Stretching
Do you ever feel like a lot of people associate the words yoga and stretching with one another? Almost if they’re synonymous with one another? Or how about yoga and flexibility? Or doing some yoga stretches in the morning?
It seems like a lot of us assume that yoga is equivalent to becoming more flexible because you’re able to “stretch” your way into a deeper pose. And I think that a lot of yogis actually want to accomplish getting as deep into a pose as possible and are willing to learn the ways in which they can better achieve this as well.
One of the best ways to find out how we can all get deeper into a pose and benefit from increased flexibility is to know exactly the physiology of what is happening inside our joints, muscles, and body as well deciphering the different types of yoga poses that can increase our mobility and range of motion (ROM).
Lets begin with discussing the different types of stretches. There are 5 main types according to the American College of Sports Medicine (ACSM):
⦁ Static Stretches – One slowly eases into a position, holds for <30 secs and then releases the stretch. Best time to do this type is after your muscles have been warmed up.
⦁ Active Static – Holding a particular stretch is determined by the strength of the muscles responsible for that movement (referred to as agonist muscles). This is what is used in Yoga.
⦁ Passive Static – You hold the stretch without the assistance of any equipment (no band or bar). This is mostly commonly done after you have finished a workout and you want to release tense muscles.
⦁ Dynamic Stretching – This is stretching with movement (moving your joint repeatedly through a range of motion) and is ideal to do pre-workout.
⦁ PNF Stretching – Proprioceptive Neuromuscular Facilitation requires two people in order to perform the stretch and is ideally done in clinical and fitness settings. It involves an isometric hold followed by a static stretch of the same muscle group.
⦁ Ballistic Stretching – This type of stretching uses bouncing movements to create momentum which moves the muscle into a stretch. For those participating in ballistic exercises like basketball can use this type of stretching.
So now that we know that yoga predominately uses active static stretches (though both passive and dynamic are also used in certain poses as well), let’s determine why it’s important to know the physiology of your inner being too.
A knowledge of physiology can help you visualize the inner workings of your body and focus on the specific mechanisms that help you stretch.
For example, if you know that your legs are tight then having the ability to pinpoint if that tightness is important. Like is it due to poor skeletal alignment, stiff connective tissues or nerve reflexes that are trying to prevent overuse? This method can help you decide whether to continue going deeper into the stretch or backing off completely.
So establishing the feeling as either a warning sign to prevent injury or as a “good type of pain” is crucial in your day to day practice.
If you really want to gain the benefits of these morning yoga stretches, it’s time to invest in a good yoga mat for your daily practice.
This mat by GoYoga is one of the most highly coveted yoga mats available online. It’s known to have a good grip and be extra thick, all with an excellent price point. It’s available on amazon (in several different colors), with the pink one being the most popular of them all.
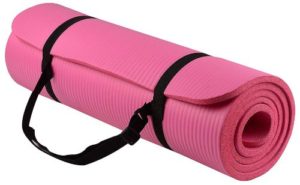
Click on the BalanceFrom GoYoga All Purpose Mat on amazon
This yoga mat pictured above is so popular that I decided to order it for myself and I can’t wait to try it out any day now! It comes with an excellent price tag and has all the features that I really look for in a good yoga mat.
These include: Double sided (!) non-slip surfaces, it’s extra thick (which is good for me as I’ve had two knee surgeries), moisture resistant, the length is perfect, and others have reported that it doesn’t wear and tear easily. To me, that’s a recipe for success (in all my yoga poses).
Remember that yoga is more than doing simple stretches, it is a way of life that connects your body and mind and helps to build strength, increase your flexibility and happiness all in one.
Let’s take a look at all morning yoga stretches that you can do to boost your mood throughout the day.
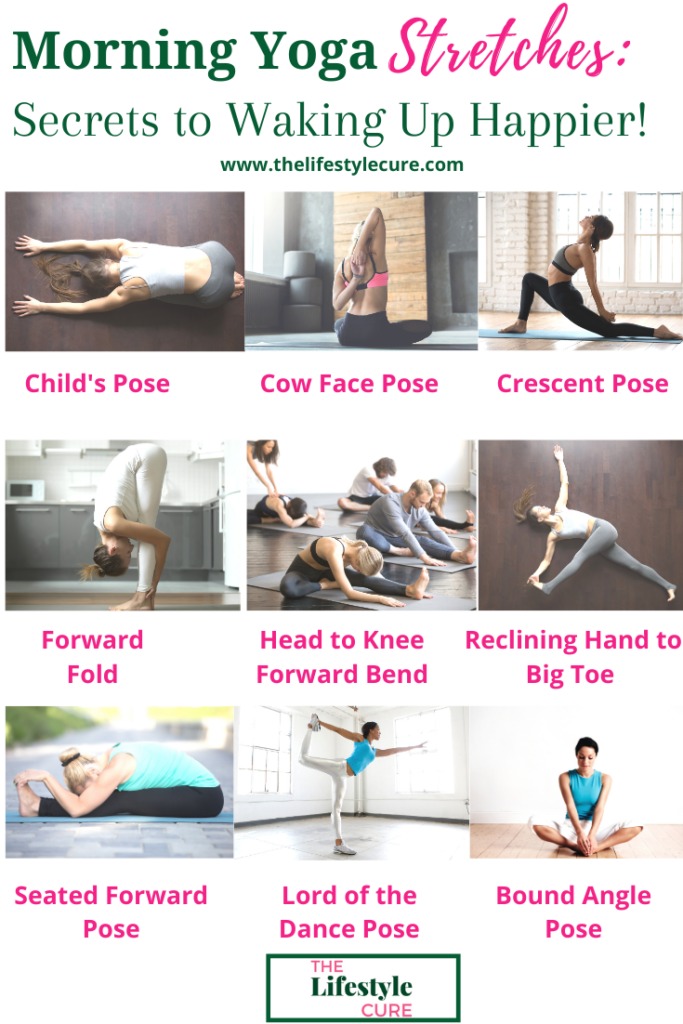
Morning Yoga Stretches: Secrets To Waking Up Happier!
⦁ Child’s Pose

1. Beginning on all fours, slowly exhale and begin to lower your hips so that they end up resting on your heels and your forehead on the floor. Your knees can be touching or spread apart depending upon your flexibility level.
2. Make sure your arms are stretched out in front of you with your palms resting on the floor (they can also be lying by your side with palms facing upward).
3. Taking slow, deep breathes while you actively engage your stomach against the thighs while you inhale.
4. Hold for 5-10 breathes and then release.
⦁ Cow Face Pose

1. Begin by sitting crossed legged on the mat. Slowly start to bring your knees toward the center of your body (while still crossed) by stacking your left knee directly over your right, with the left knee slightly ahead of the right knee. Use your hands for help if needed.
2. Take the opposite arm (in this case, it would be your right arm) overhead.
3. Now bend at the elbow and slowly bring the right hand to the back of the neck.
4. From here, take the right arm out to the side, bend the elbow, and bring the arm up the center of the back.
5. If possible (will depend upon your flexibility) try and clasp your hands behind your back.
6. Inhale and exhale slowly yet deeply.
7. Hold the pose for 30 secs or more, release, and repeat on the opposite side (right leg over left leg and left arm on top).
⦁ Extended Puppy Pose
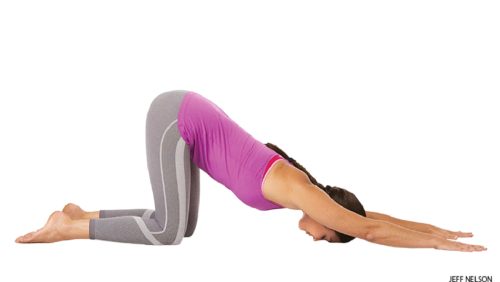
1. Start in tabletop position. Shoulders stacked above wrists and hips stacked above knees.
2. From here begin to walk your hands out straight ahead while lowering your chest to the mat as you move ahead. Keep going until your forehead is resting on the mat. Make sure your lower body stance has not changed as of now.
3. Now slowly start to raise your forearms off the ground by activating your arms by pressing into your palms and lifting your elbows. Draw your shoulder blades back and push your hips up toward the ceiling.
4. Breathe so as to relax your neck and to maintain a neutral spine while you lengthen.
5. Hold the pose for 5-10 breaths and then release back into a tabletop position.
⦁ Crescent Pose
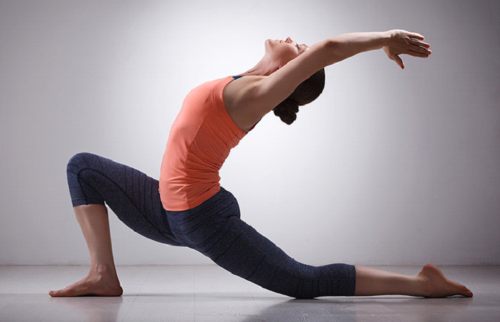
Shutterstock
1. Begin in the mountain pose. Move your right leg a couple of feet forward and bend it to a 90 degree angle so that your knee is directly over the center of your foot making sure that your left heel is lifted off of the floor.
2. Now take your arms overhead, palms facing one another, shoulders back and down, as your hips stay squared forward.
3. Lengthen through your spine as you slowly drop your tailbone down toward the mat.
4. Breathe slowly for 5-10 deep breaths, release, and then repeat on the opposite side.
⦁ Head-To-Knee Forward Bend

1. Begin in a seated position with both legs extended straight out in front of you. Make sure your back is nice and long.
2. Now start to bend your right knee all way until your heel is able to touch your inner thigh of the opposite leg (in this case it would be your left inner thigh) while the outer edge of foot remains on the mat.
3. Begin to move your torso so that it now faces your left foot (which is flexed and pressed firmly into the floor to encourage mind to muscle connection).
4. Taking a deep breath in extend both arms up straight overhead, lengthen all parts of the body at the same time.
5. Now exhale and slowly start to hinge at the hips as you fold forward over your extended leg. Let your hands fall wherever seems most natural to you.
6. You spine should be straight, avoid curving or rounding your spine in order to get deeper into the fold, that will happen over time.
7. Stay like this for 5-10 deep breaths then release, and repeat on the opposite side.
⦁ Reclining Hand-To-Big-Toe Pose

1. Start by lying down on your back with arms and legs extended on the mat.
2. Exhale to bend your right knee in to your chest, now depending upon your flexibility, interlace your fingers either around the back of your thigh, calf, or hook onto your big toe, feel free to use a strap and loop it around the ball of your right foot and hold onto the ends of the strap if this feels more comfortable for you.
3. From here, take a deep breath in and begin to straighten your right leg as far as what seems comfortable while directing your heel toward the ceiling. Make sure to maintain a long back and to avoid letting your hips and/or buttocks rise by pressing your back into the mat.
4. At the same time, you have the option to actively engage your extended leg that is on the mat (here it is the left one) by pressing it into the ground beneath you or to bend at the knee, with the sole of your foot pressing firmly down on the mat.
5. Make sure to have a neutral spine, relaxed shoulders and jaw, and your chest should be broadened.
6. While taking deep breathes in and out, hold the pose for 10-30 breaths, release your right leg on an exhale by bending your knee and drawing it back to your chest, after which you can repeat on the opposite side.
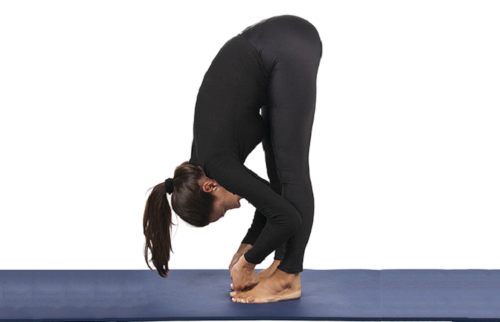
⦁ Standing Forward Bend

1. Begin by standing with your feet together with a slight bend in your knees and start to bend your torso over your legs by hinging at the hips (not your lower back).
2. Next place your hands on the ground either next to your feet, on your feet, or on your thighs; this will depend upon your own flexibility.
3. Now take a deep breath in and try to lengthen your spine, without rounding your back and to remember that your eye line should remain forward.
4. While exhaling try to lengthen your torso further down but keep long in your neck and extend the crown of your head down.
5. Hold this pose for 5-30 breaths and then release by slowing rising back up, one vertebra at a time.
⦁ Seated Forward Bend

1. Begin by sitting down on your mat. Extend your legs straight out in front of you by grounding your thighs into the floor to actively engage them.
2. Take a big deep breath in and slowly raise your arms up overhead.
3. Now as you take a deep breath in and exhale out, start hinging at the hips and lengthen through your torso as you fold forward to meet your thighs (or as close as you can get).
4. Keep your neck long and rest your forehead on your legs (if possible).
5. Take a hold of the soles of your feet as your arms naturally come down with your torso. If this is not possible take a strap and hold on to the end of the straps after having looped it around the soles of your feet.
6. Hold for 5-20 deep breaths and then gently release your hands and come back up slowly.
⦁ Garland Pose

1. Begin in a mountain pose. Your feet should be just outside your hips, with your toes spread out and pointed outwards.
2. Now take a deep breath in and begin to bend your knees all the way down (as if you are sinking down into a low squat position) until your hips are lower than knee level. If needed, place a block under your buttocks to sit on as you come down.
3. Take your arms and bring them to midline and place your palms together at heart level.
4. Make sure that your arms are inside of your legs with your elbows pressing out to the inside of your knees to encourage opening of the hips to occur.
5. Breath in and out and lengthen your spine without curving your back.
6. Push your elbows into your knees to open your hips, and gently press the inside of your knees into your elbows.
7. Hold this pose for 5-30 breaths and release.
⦁ Bound Angle Pose

1. Begin by sitting on your mat with both hips firmly grounded and your legs extended out in front of you.
2. Slowly while taking a deep breath in, start to bring your heels in towards your pelvis by bending at your knees. Try to have both soles touching one another.
3. Take your hands and clasp them around your feet by interlacing your fingers.
4. Take a moment to ensure that your hip bones are still on the mat and not raised; relaxing your groin to encourage opening of the knees to take place and extending deep through the spine to enhance lengthening of the body.
5. Hold the pose for 5-30 deep breaths and then release.
⦁ Lord Of The Dance Pose

1. Start in an upright position.
2. Begin by anchoring your weight solely onto one foot as you lift the opposite heel toward the buttocks with a bent knee.
3. Now as you lift the bent knee towards your buttocks, take the hand on the same side as this and grasp the outside of the foot. Try to lift the leg as high above the earth as possible.
4. Exhale and take the arm on the opposite side of the body as the bent leg and bring it forward so that it is parallel to the ground in front of you.
5. Gaze should remain forward at all time and your torso should be actively contracted to avoid compressing your lower back.
6. Hold for 5-10 breathes, release, and repeat on opposite side.
⦁ Big Toe Pose
Shutterstock
1. Just like the forward fold pose but here you try to grasp your big toe on each foot individually for 5-20 breathes at a time.
2. Release and then repeat on the opposite side.
I hope these morning yoga stretches will leave you with better posture and a little happier by the end!
Stay happy, stay healthy with these yoga stretches first thing in the morning tomorrow!
For more on yoga check out:
Top 11 Weight Loss Yoga Poses! For Beginners
Top 11 Hip Opening Yoga Poses For Flexibility And Pain Relief!
11 Absolute Best Yoga Poses For Beginners
The following two tabs change content below.

Hi I'm Dr. Tina Gupta physician-turned-type 2 diabetes, prediabetes and weight loss coach who helps you easily lower your blood sugars and lose weight by getting to the heart of your needs and desires instead of depending on food to fill that void. If you're interested in working together, email me at drnav@thelifestylecure.com to get started today!
